在上一篇中,我们学习了关于前端框架与使用模板的一些知识,知道如何在模板中调用传入的参数以及如何继承模板以减少重复的代码,但是仅仅这些还是不太够的,有时候我们还需要对传入的参数进行一些判断与操作,所以这一篇我们来深入了解一下flask在渲染模板时的一些其他操作
一、模板接受的数据类型
在python中数据有各种各样的类型,比如字符串、整数等等,而在模板中也是可以接受不同类型的数据,jinja2支持python的所有数据类型,包括字符串、整数、浮点数、列表、字典、对象等,在模板中的使用方法也和在python中无异。
二、过滤传入的数据
上一篇我们在模板中使用{{ user }}这样的语句,用变量名来调用传入的参数,但有时候我们需要对变量进行一些处理,比如将结构性带html标签的文章传入模板中,如果不进行处理就会出现文章无法正常显示,所以对于变量进行过滤就显得非常重要啦
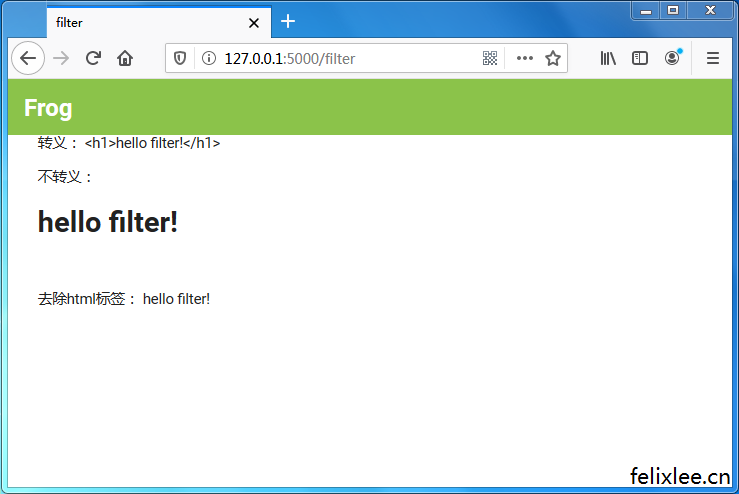
jinja默认对传入的变量进行转义,即传入html语句或js语句,在渲染出的页面里的是无法执行的,而是显示为普通的字符。
要想变量正常显示我们就需要用到过滤器,jinja2提供许多的过滤器,这里展示几个常用的过滤器(更多过滤器请访问jinja2文档的List of Builtin Filters查看)
| 过滤器 | 作用 |
|---|---|
| safe() | 不对内容进行转义 |
| striptags() | 去除内容所有的html标签 |
| trim() | 去除内容首尾空行 |
过滤器的用法为{{ user|safe }}
让我们来测试一下吧
frog.py
@app.route('/filter')
def test_filter():
    return render_template('filter.html',words='<h1>hello filter!</h1>')
templates/filter.html
{% extends 'base.html' %}

{% block title %}filter{% endblock %}

{% block content %}
转义:         {{ words }}<br/><br/>
不转义:       {{ words|safe }}<br/><br/>
去除html标签: {{ words|striptags }}
{% endblock %}
三、数据的判断与渲染
有时候我们需要对传入模板的数据进行判断,满足某种条件才会渲染出某些部分,否则渲染另一种部分,让我们来看看如何实现吧!
frog.py
@app.route('/age/<int:myage>')
def age(myage):
    return render_template('age.html',myage=myage)
templates/age.html
{% extends 'base.html' %}

{% block title %}你多大了?{% endblock %}

{% block content %}

{% if myage<=12 %}
<h1>你是一名少年</h1>
{% elif myage <18 %}
<h1>你是一名青少年</h1>
{% else %}
<h1>你是一名成年人</h1>
{% endif %}

{% endblock %}
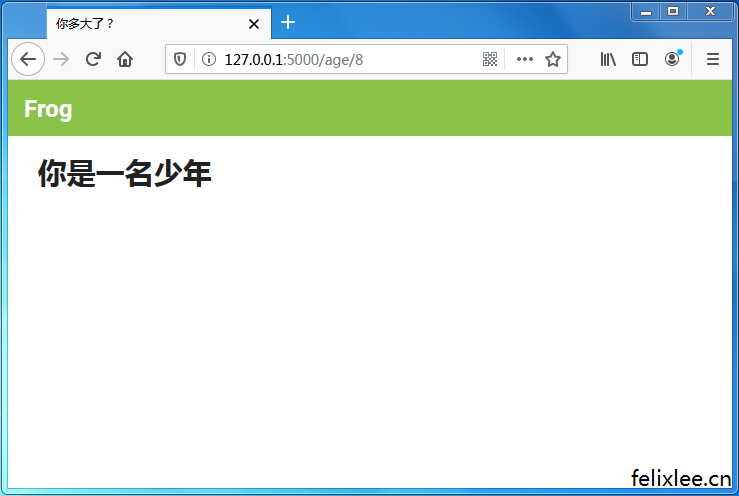
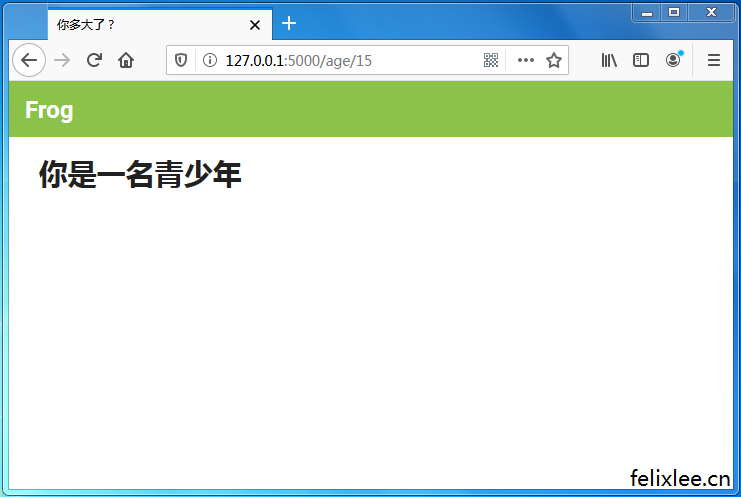
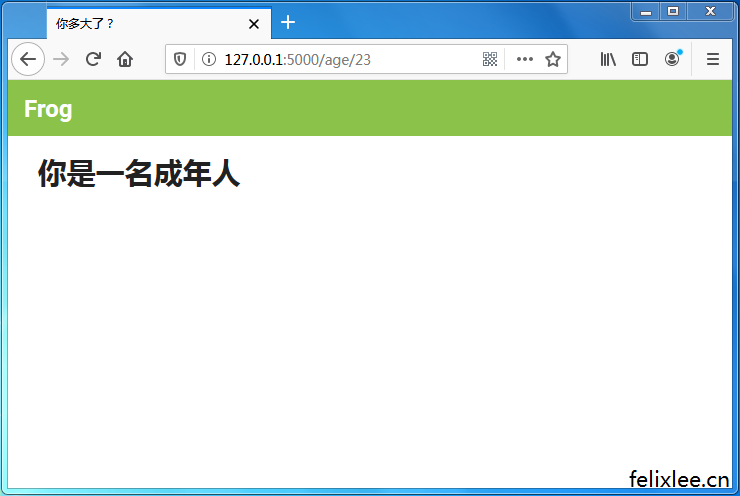
我们来测试一下
在模板中我们用{%%}包裹着判断语句,一旦满足条件就渲染判断语句下的部分,判断部分由{% if ... %}开头,{% endif %}结尾。
四、遍历数据
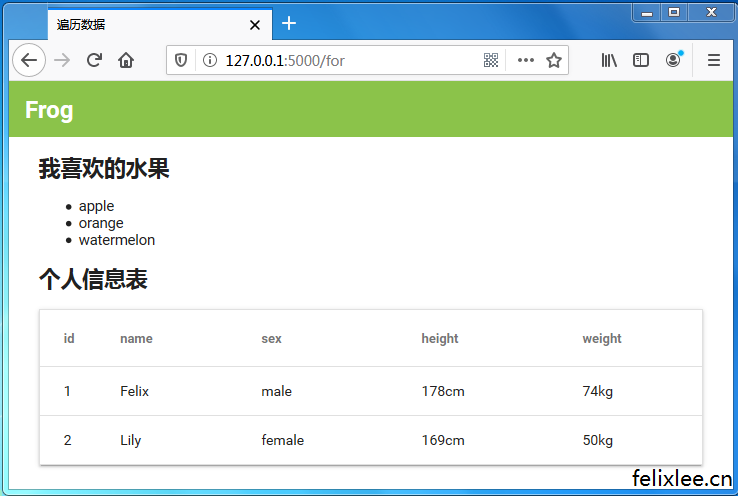
既然jinja2支持传入列表、字典之类的数据类型,那在模板中也应当支持循环遍历数据的,写法也是用{%%}包裹,让我们来看看吧!
frog.py
@app.route('/for')
def for_return():
    fruits=['apple','orange','watermelon']
    profile1={'id':1,'name':'Felix','sex':'male','height':'178cm','weight':'74kg'}
    profile2={'id':2,'name':'Lily','sex':'female','height':'169cm','weight':'50kg'}
    profiles=[profile1,profile2]
    return render_template('for.html',fruits=fruits,profiles=profiles)
templates/for.html
{% extends 'base.html' %}

{% block title %}遍历数据{% endblock %}

{% block content %}

<h2>我喜欢的水果</h2>
<ul>
    {% for fruit in fruits %}
    <li>{{ fruit }}</li>
    {% endfor %}
</ul>


<h2>个人信息表</h2>
<table class='mdui-table'>
    <thead>
        <tr>
            <th>id</th>
            <th>name</th>
            <th>sex</th>
            <th>height</th>
            <th>weight</th>
        </tr>
    </thead>
    <tbody>
        {% for profile in profiles %}
        <tr>
            <td>{{ profile['id'] }}</td>
            <td>{{ profile['name'] }}</td>
            <td>{{ profile['sex'] }}</td>
            <td>{{ profile['height'] }}</td>
            <td>{{ profile['weight'] }}</td>
        </tr>
        {% endfor %}
    </tbody>
</table>

{% endblock %}
然后我们测试一下
在模板中我们使用{% for item in items %}......{{ item }}......{% endfor %},这样的形式来循环迭代数据
五、模板中的函数(宏)
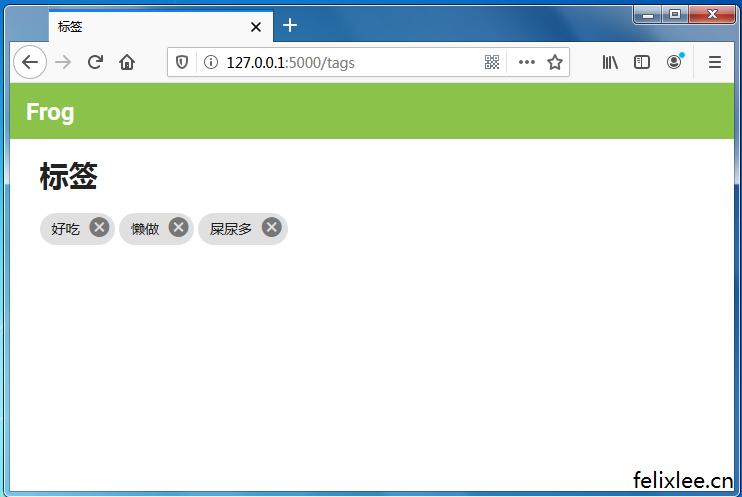
有时候我们需要为某些对象数据生成一种特定的结构样式,但经常会出现需要渲染许多结构相同只是部分数据不同的组件,这时宏就非常有必要了,宏类似于函数,我们输入一些参数,便渲染出带有参数数据的一种特定结构样式,我们来试试看吧!
frog.py
@app.route('/tags')
def tags():
    return render_template('tags.html')
templates/tags.html
{% extends 'base.html' %}

{% block title %}标签{% endblock %}

{% block content %}

{% macro tag(words) %}
<div class='mdui-chip'>
    <span class='mdui-chip-title'>{{ words }}</span>
    <span class='mdui-chip-delete'><i class='mdui-icon material-icons'>cancel</i></span>
</div>
{% endmacro %}

<h1>标签</h1>
{{ tag('好吃') }}
{{ tag('懒做') }}
{{ tag('屎尿多') }}

{% endblock %}
看一下效果
我们使用{% macro mcname(parm) %} ...... {{ parm }} ......{% endmacro %}来定义一个宏,在需要用到宏的地方使用{{ mcname(parm) }}来调用宏
有时候可能需要在多个模板中用到同一个宏,这时候我们就可以把宏单独保存到一个模板中,在需要用到的模板中引入宏的模板即可,像这样
templates/macros.html
{% macro tag(words) %}
<div class='mdui-chip'>
    <span class='mdui-chip-title'>{{ words }}</span>
    <span class='mdui-chip-delete'><i class='mdui-icon material-icons'>cancel</i></span>
</div>
{% endmacro %}
templates/tags.html
...
{% import 'macros.html' as macros %}

{{ macros.tag('好吃') }}
...
以上就是关于模板渲染的一些操作啦,其实这一部分还是比较有意思的,就像在画画一样,学到这里已经可以做出许多有意思的东西了,接下来我们还将继续关于模板的学习,那我们下一篇再见吧!
当前Frog项目仓库地址:http://codemole.cn/felix/Frog/src/frog3.2
-
最新文章
- 爱尔法鲁酒吧问题python实现,复杂经济学博弈论自组织自适应系统
- python字体子集化
- 一些用平板画的画和用flipaclip画的动画
- phpcms通用缓存装饰器,给函数的输出增加缓存
- python根据行业根词及百度百科提取行业属性
- python使用朴素贝叶斯实现简单中文文本分类
- 基于时间戳与对称加密实现简单的token验证
- 递归打印出树形结构数据(多层级数据)(小思考)
-
最新随笔
- 海洋公园逛逛(ps:北极熊馆动物状态都感觉不太好)
- 半夜梦到一段诗,但醒来不太记得全部,让deepseek续写一下,我只记得前面是: “当元论状赵金海,不出凭栏***” 至于为什么会突然起来记下这段诗,是空调水一直滴在琴上,给我吵醒了(惊醒!),深圳台风刚过,湿度大
- 渐变
- 周末打开摩尔庄园给拉姆喂点吃的,碰到个大佬带着同服的一群人去一大堆以前的老场景逛嘞。对我来说,印象最深刻的是浆果丛林刚开放的那段时间。
- 稍微调整一下首页样式(旧 → 新)
- 给随笔页面加了个动态加载的功能,不然一次性加载太多图片访问有点慢
- 这个桥去年来看的时候貌似还没有
- 中秋经典BGM:滴滴滴
 粤公网安备 44030702002444号